# Perception Tutorial
## Phase 1: Setup and Basic Simulations
In this phase of the Perception tutorial, you will start from downloading and installing Unity Editor and the Perception package. You will then use our sample assets and provided components to easily generate a synthetic dataset for training an object-detection model. Through-out the tutorial, lines starting with bullet points denote the individual actions you will need to take in order to progress through the tutorial. This is while non-bulleted lines will provide additional context and explanation around the actions. If in a hurry, you can just follow the bullets!
### Step 1: Download Unity Editor and Create a New Project
* Navigate to [this](https://unity3d.com/get-unity/download/archive) page to download and install the latest version of Unity Editor 2019.4.
When you first run Unity, you will be asked to open an existing project, or create a new one.
* Open Unity and create a new project using the Universal Render Pipeline. Name your new project _**Perception Tutorial**_, as shown below.

### Step 2: Download the Perception Package and Import Samples
Once your new project is created and loaded, you will be presented with the Unity Editor interface. From this point, whenever we refer to _the editor_, we mean Unity Editor.
* From the top menu bar, open _**Window**_ -> _**Package Manager**_.
As the name suggests, the _**Package Manager**_ is where you can download new packages, update or remove existing ones, and access a variety of information and additional actions for each package.
* Click on the _**+**_ sign at the top-left corner of the _**Package Manager**_ window and then choose the option _**Add package frim git URL...**_.
* Enter the address `com.unity.perception` and click _**Add**_
It will take some time for the manager to download and import the package. Once the operation finishes, you will see the newly download Perception package automatically selected in the _**Package Manager**_, as depicted below:

Each package can come with a set of samples. As seen in the righthand panel, the Perception package includes a sample named _**Tutorial Files**_, which will be required for completing this tutorial. The sample files consist of example foreground and background objects (foreground: objects that the eventual machine learning model will try to detect, background: objects that will be placed in the background as distractions to for the machine learning model), randomizers, shaders, and other useful elements to work with during this tutorial.
* In the _**Package Manager**_ window, from the list of _**Samples**_ for the Perception package, click on the _**Import into Project**_ button for the sample named _**Tutorial Files**_.
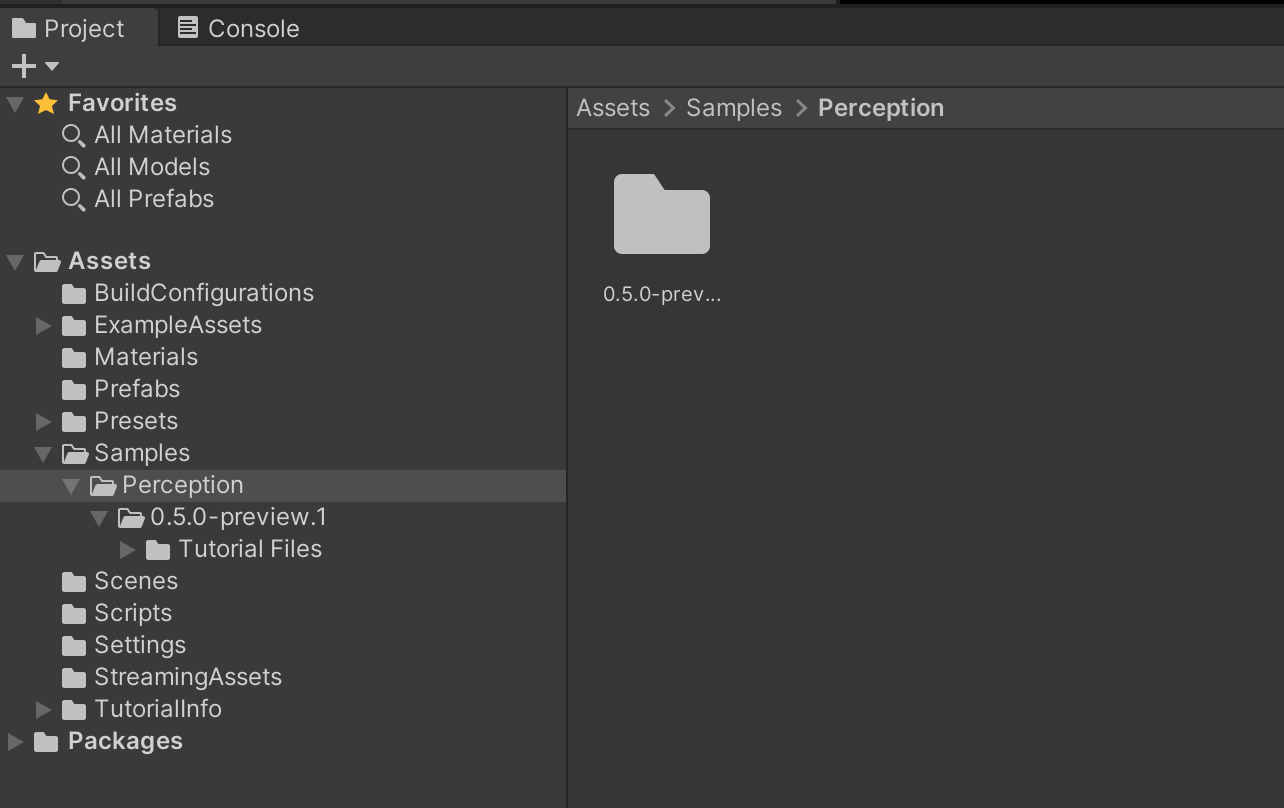
Once the sample files are imported, they will be placed inside the `Assets/Samples/Perception` folder in your Unity project. You can view your project's folder structure and access your files from the _**Project**_ tab of the editor, as seen in the image below:

* The _**Project**_ tab contains a search bar; use it to find the file named `ForwardRenderer.asset`, as shown below:

* Click on the found file to select it. Then, from the _**Inspector**_ tab of the editor, click on the _**Add Renderer Feature**_ button, and select _**Ground Truth Renderer Feature**_ from the dropdown menu:

This step prepares your project to render tailor-made images that will be later used for labeling the generates synthetic data.
### Step 3: Setup a Scene for Your Perception Simulation
Simply put, in Unity, Scenes contain any object that exists in the world. This world can be a game, or in this case, a perception-oriented simulation. Every new project contains a Scene named _**SampleScene**_, which is automatically openned when the project is created. We will now modify this scene to remove the parts we will not need and tailor it to this tutorial.
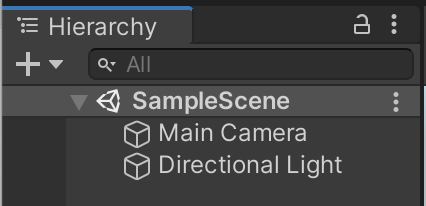
The _**Hierarchy**_ tab of the editor displays all the Scenes currently loaded, and all the objects currently present in each loaded Scene, as shown below:

* Go ahead and remove everything shown in the hierarchy except for _**Main Camera**_ and _**Directional Light**_.
To remove objects, select them and press _**Delete**_ (Windows) or _**cmd+delete**_ (Mac) on your keyboard. You can also right-click an object and click _**Delete**_. After this step, your Scene hierarchy should look like below:

We will now add the necessary components to the camera already present in the scene in order to equip it for the perception workflow. To do this, we need to add a `PerceptionCamera` component to the camera, and then define which types of ground-truth we wish to generate using this camera.
* Select _**Main Camera**_ in the Scene hierarchy, then, in the _**Inspector**_ tab, click on the _**Add Component**_ button.
* Start typing `Perception Camera` in the search bar that appears, until the `Perception Camera` script is found, with a **#** icon to the left.
* Click on this script to add it as a component. Your camera is now a _**Perception**_ camera.
Adding components is the standard way in which objects can have various kinds of logic and data attached to them in Unity. This includes objects placed within the Scene (called _**GameObjects**_), such as the camera above, or objects outside of a Scene but in your project folders (called _**Prefabs**_).
The `Perception Camera` component comes with its own UI to modify various aspects of synthetic frame generation and annotation, as well as add or remove ground-truth labelers and labelling configurations. If you hover your mouse pointer over each of the fields shown (e.g. _**Capture Interval**_), you will see a tooltip popup with an explanation on what the item controls. You may see a warning at the bottom of this UI regarding asynchronous shader compilation. If so, follow the instructions in the warning message to disable this functionality and remove the warning.
As seen in the UI for `Perception Camera`, the list of _**Camera Lebelers**_ is currently empty. For each type of ground-truth you wish to generate along-side your captured frames (e.g. 2D bounding boxes around objects), you will need to add a corresponding _**Camera Labeler**_ to this list.
To speed-up your perception workflow, the Perception comes pre-packaged with four popular labelers for object-detection tasks; however, if you are comfortable with code, you can easily add your own custom labelers. The labelers that come with the Perception package cover **2D bounding boxes, object counts, object information (pixel counts and ids), and semantic segmentation images (each object rendered in a unique colour)**. In this tutorial, we will be working with the first two.
* Click on the _**+**_ button to the bottom right corner of the empty labeler list, and select _**BoundingBox2DLabeler**_.
* Repeat the above step and this time select _**ObjectCountLabeler**_.
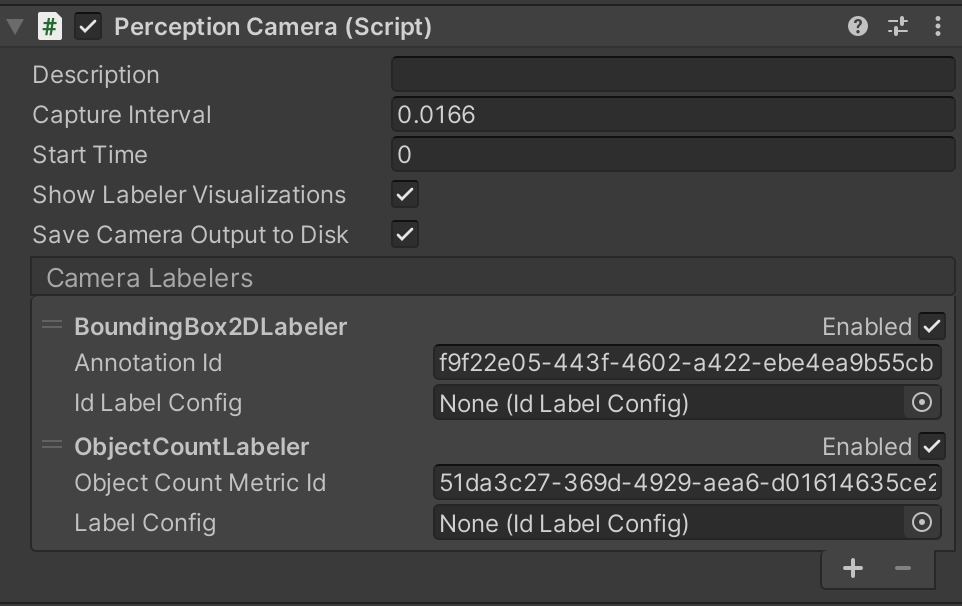
Once you add the labelers, the _**Inspector**_ view of the `Perception Camera` component will look like this:

### Specify Ground-Truth and Object Labels
It is now time to tell your each labeler added to the `Perception Camera` which objects it should label in the generated dataset. For instance, if your workflow is intended to generate frames and ground-truth for detecting chairs, your labelers would need to know that they should look for objects labeled "chair" within the scene. The chairs should in turn also be labeled "chair" in order to make them visible to their intended labelers. We will now learn how to set-up these configuartions.
You will notice each added labelers has a field named `Id Label Config`. By adding a label configuration here you can instruct the labeler to look for certain labeles within the scene and ignore the rest. To do that, we should first create a fitting label configuration.
* In the _**Project**_ tab, right-click the `Assets` folder, then click `Create -> Perception -> Id Label Config`.
This will create a new `Id Label Config` asset inside the Assets `folder`.


