36 KiB
Image Sequencer

Introduction
The VFX Image Sequencer is a tool which provide Visual Effect Artists with the means to process sequences of images, and generate texture assets such as flipbooks texture sheets.

To edit sequences of images, the tool relies on Image Sequence assets. These template assets contain references to project imported textures, a set of processing settings, and an export configuration. Every asset can be considered as a “Project File” in order to generate one output texture file or a sequence of these.
Quick Start Guide
Image Sequence Assets can be created from the Project Window Create Menu under the Category VFX Toolbox. Each asset contains configuration to read a sequence of images and output one or a sequence of textures.
These assets can be considered as a “Project Template” for producing flipbook texture sheets, so you can retain the settings and iterate on them for future updates.
Creating Image Sequences
Image Sequences are assets that can be created using the main Menu : Assets/Create/Visual Effects/Image Sequence. Every Image Sequence asset contains a "Project Template" to create a Texture Sheet.
Opening Image Sequences
The Image sequencer window is the main editor of Image Sequence assets. You can open this window :
- By clicking the Window/Visual Effects/Image Sequencer menu item
- By clicking the Edit Sequence button
- By double-clicking an Image Sequence asset in the Project Window.
While the Image Sequencer window is open, selecting another image sequence in the project window will load it in the Image Sequencer window.
Editing Image Sequences
Once created, the Image Sequence can be edited in the Image Sequencer using the following actions:
- Adding Input Frames
- Add and Edit Processors to alter the source image sequence.
- Export the Output of the Processors as one or many Images
In order to switch between these actions, you can use the 3 tabs located at the top of the left inspector pane:

If no images are not imported, the Processors and Export tabs are disabled and cannot be clicked.
Adding Input Frames

You can import images in the sequence by clicking the Input Frames tab Button to enter Input Frames editing mode then by dragging them directly from the Project Window to the Image Sequencer window, or by dragging a folder that contains images from the Project Window to the Image Sequencer Window
For more information, see the Input Frames Workflow section of this document.
Adding and Editing Processors

After adding Input Frames, by clicking the Processors Tab button, you can enter the Processors editing Mode. In this view you can add processors in the reorderable list, edit them and iterate to generate texture sheets.
In this mode you will be able to perform operations on textures such as Assembling and Disassembling Texture Sheets, Adjusting Timing of a Sequence, Make an image Sequence looping, Crop images to save empty space, Fix borders, adjust Colors, and many more actions.
For more information, see the Processors Workflow section of this document.
Exporting Images
After Adding Processors, when you have a result that suits you, you can click the third Tab Button "Export" to enter Export Mode. In this mode you can configure the texture generation options and also the texture import options.
In this view you will be able to set up your output textures either as color, masks or normal maps and ensure they are exported correctly.
For more information, see the Export Workflow section of this document.
Image Sequence Inspector

Upon selecting an Image Sequence Asset, the inspector displays an overview of this asset, with its input frames, processors overview, and optionally the Exported file (if any). This is only a read-only overview of the processing information of this sequence.
- To edit this sequence, click the Edit Sequence button, this will open the Image Sequencer Editor Window.
- You can preview input sequence of images by clicking the preview button.
Image Sequencer Window

The Image Sequence editor window comes with two zones:
- The Toolbar at the top provides controls to access the currently edited Image sequence, and display controls for the Canvas.
- The Inspector (left pane) displays contextual controls for adding input frames, configure processing, and export to other textures.
- The Canvas (right pane) offers preview of the processed sequence at different stages (input sequence, processors, exported texture). It contains play controls at the bottom, view options in the top toolbar, and handles panning and zooming using mouse.
Inspector
The inspector lies in the left part of the window and is the part of the window where you will make changes to the Image Sequence. At the top of the inspector lies a 3-Button tab in order to switch between the editing modes : Input Frames, Processors and Export.
Canvas
The canvas is in the right side of the window and is used to preview the changes made in the Image Sequencer Inspector. It displays contextually either the Input Frames, the output of a processor, or the exported texture.
Navigation in the canvas is made by using the mouse or trackpad.
Some keyboard shortcuts enable access to same features accessible with the mouse:
-
Alt+Left Mouse Drag : Pan the viewport
-
Middle Mouse Drag : Pan the viewport
-
Alt+Right Mouse Drag : Zoom the viewport
-
Mouse Wheel : Zoom the viewport
Some keyboard shortcuts enable focusing on the image:
- F focuses the image, fitting the zoom to fill the viewport
- Shift + F focuses the image, with a 100% zoom
(Note that these controls are available in the options popup menu)
Sequence Playback Controls
Playback controls are visible when your sequence contains 2 or more images. They are available as a bottom panel.

The sequence playback panel contains a timeline track showing the current progress of the timeline.
Every frame is displayed in the track as a colored cell:
-
Bright blue cell displays the currently selected (displayed) frame in the canvas.
-
Blue darker cells tells that these frames have already been rendered.
-
Gray cells mean frames have not already been rendered
(You can enable automatic rendering by activating the AutoCook Option in the options menu)
Here is an overview of the Toolbar located under the sequence trackbar
- Playback Buttons
- First Frame
- Previous Frame
- Play/Pause
- Next Frame
- Last Frame
- Image & Sequence information
- Frame N on Total Count
- TCR time (based on frame rate)
- Speed and Framerate Control
- Number of frames per second
- Popup to set a given play rate
Viewport Toolbar
The viewport toolbar contains controls for toggle display of various options in the viewport.

The toolbar contains the following elements:
- Options Popup Menu: Opens the Option popup menu to configure the Canvas display options.
- RGBA toggles : Use these buttons to filter the Red, Green, Blue or Alpha channel display.
- MipMap Selector : Using this slider, you can preview the different mip-maps of the currently displayed image.
- Background brightness: Using this slider, you can adjust the background checkerboard brightness.
Options popup menu

The Options popup menu is accessed via the toolbar button on the right.It contains toggles & buttons for visibility, and commands for the view.
- Viewport Options:
- Grid Outline (Toggle) : Toggles Outline around Sub Image Cells and around texture.
- Frame Processor Overlays (Toggle) : Toggle Processor Overlay in the canvas to display visually its changes.
- Texture Filtering (Toggle) : Toggles Texture Filtering in the Canvas
Update Button

Workflow
This section details how to use the Image Sequencer and create output Texture Sheets. The workflow for a new Image Sequence is as follows:
- Import and Configure Source Images
- Create Image Sequence Asset and Open It
- Adding input frames into the Image Sequence
- Add Processors and Build your Texture Sheets
- Export the output sequence as one or many textures.
After the first iteration on an Image sequence Asset, you can open this sequence later, make adjustments, then update your output image in one click using the Update Button in the canvas
Importing and Configuring source images
Your source images will be imported inside the project for full efficiency, but they do not have to be used in your project. These textures will behave as intermediate sources for generating assets, so It could be a good Idea to use asset labels to filter them in order to ensure they are isolated and unused.
Manual settings
Texture configuration for the source images answers the “lossless quality” requirement : at this stage of workflow, you do not want to degrade quality, so importing your textures at maximum quality is required here. In order to stay at lossless quality, make sure you have the following:
- Keep your textures uncompressed :
- Use Compression : None
- Ensure your texture will not be resized if too large:
- Advanced/Non-Power of Two : None
- Max Size : 8192
- Ensure your alpha channel will not be modified by the importer:
- Disable the Alpha Is Transparency (if available)
- Ensure the sRGB flag matches your image contents:
- sRGB on for any 8-bit per component Color Image
- sRGB off for:
- Any HDR Image (exr)
- Flow Maps, Normal Maps, Bump Maps and/or masks
Asset Postprocessor
It is advised to use an AssetPostprocessor to ensure all your sources are configured correctly. Here is an example of one that would add a VFX and source label and Configure all textures within the Asset/Resources/ folder, with the same settings except disable sRGB for exr and textures with the _nrm nomenclature in their filename, or _lin nomenclature for forcing non sRGB. You can find this default example that you can modify to fit your needs at the following path of the project:
using System.IO;

namespace UnityEditor.VFXToolbox
{
    public class ImageSequencerSourcePostprocessor : AssetPostprocessor
    {
        // Internal flags for usage
        public enum Usage
        {
            Color,
            LinearData
        }

        public const string m_RootFolder = "Assets/VFXResources";
        public const string m_NormalNomenclaturePostFix = "_nrm";
        public const string m_LinearNomenclatureSuffix = "_lin";
        public const string m_OpticalFlowNomenclatureSuffix = "_of";
        public readonly string[] m_Labels = new string[] { "Weapon", "Audio" };

        void OnPreprocessTexture()
        {
            if (assetPath.StartsWith(m_RootFolder)) // for all assets in VFX resources folder
            {
                string filename = Path.GetFileName(assetPath);
                string extension = Path.GetExtension(assetPath);

                // Default usage is color
                Usage usage = Usage.Color;

                // if containing normal suffix, switch to linear
                if (filename.ToLower().Contains(m_NormalNomenclaturePostFix.ToLower()))
                    usage = Usage.LinearData;

                // if containing linear suffix, switch to linear
                if (filename.ToLower().Contains(m_LinearNomenclatureSuffix.ToLower()))
                    usage = Usage.LinearData;

                // if containing opticalflow suffix, switch to linear
                if (filename.ToLower().Contains(m_OpticalFlowNomenclatureSuffix.ToLower()))
                    usage = Usage.LinearData;

                // if HDR, switch to linear
                if(extension.ToLower() == "EXR".ToLower())
                    usage = Usage.LinearData;

                TextureImporter importer = (TextureImporter)assetImporter;

                // Even if we have normalmaps, we don't want to encode them in swizzled NM yet.
                importer.textureType = TextureImporterType.Default;

                switch(usage)
                {
                    default: // Color, but should not happen
                    case Usage.Color:
                        importer.sRGBTexture = true;
                        break;
                    case Usage.LinearData:
                        importer.sRGBTexture = false;
                        break;
                }

                importer.alphaSource = TextureImporterAlphaSource.FromInput;
                importer.alphaIsTransparency = false;
                importer.maxTextureSize = 8192;
                importer.mipmapEnabled = true;
                importer.mipmapFilter = TextureImporterMipFilter.KaiserFilter;
                importer.npotScale = TextureImporterNPOTScale.None;
                importer.textureShape = TextureImporterShape.Texture2D;
                importer.textureCompression = TextureImporterCompression.Uncompressed;

            }
        }
    }
}
Here are some guidelines for handling various situations when your source image changes:
- Source file changes: In order to update these sources (i.e. you make changes inside your 3D VFX package and render your frames again), just overwrite the files. Source sequence length increases: If your sequence length ever changes, you will have to manually adjust your sequence length. A safe way to do this is to remove all the frames in the input sequence by clearing the list, then drag and drop the folder again.
- Source sequence length decreases: this corner case is not yet automatically addressed so you will have to manually trim the exceeding frames by deleting them in the project view. (or use a post-render script in your 3D Package to remove the files and the meta files)
Creating an Image Sequence
You can create image sequences using the Create Asset Menu:
- From the main Menu : Assets/Create/Visual Effects/Image Sequence
- From the main Project Window + Menu : Visual Effects/Image Sequence

After Clicking the item in the menu, enter the name of your Image Sequence asset in the Project View, then press Return key to validate.
Alternatively, When the Image Sequencer window is opened with no asset selected (eg: when opened from the menu), the Image Sequencer Window displays a message that informs that no Asset is selected, and provides the option to Create an image sequence from a button. When clicked, you can save a file for your new asset.

Editing an Image Sequence asset
After Creating the Image Sequence, you can either:
- Double click its icon in the Project Window
- Click its Edit Sequence button at the top of the Unity Inspector
- Just select this asset while having the Image Sequencer window open.
Input Frames
The first operation you need to do when working on an Image Sequence asset is to add Input Images to this sequence. These Images need to be already imported into your project and it is advised that they have particular settings in order to keep them as maximum quality. (See Importing and Configuring Source images)
You can import images in the sequence by clicking the Input Frames tab Button to enter Input Frames editing mode then :
- By dragging them directly from the Project Window to the Image Sequencer window
- By dragging a folder that contains images from the Project Window to the Image Sequencer Window
- By selecting textures in the Project Window and clicking the plus button at the bottom of the reorderable list.
After importing, Images can be added, reordered, deleted, and using the popup menu, you can also perform actions such as sorting alphabetically. The Actions Popup Button offers you the following menu options:
- Clear : Removes all the elements in the Input Frames List
- Sort All : Sorts all elements in the input frames list alphabetically
- Reverse Order : Reverses the order of all elements in the Input Frames list
Processors
After adding Input Frames to the Image Sequence, you can go into Processor Editing mode. To do so, click the Processors Tab Button at the top of the Left pane.
Processor Mode Inspector
When entering Processor mode, the left pane inspector changes and presents the following information:
![]()
Clear (Button) : Clears the current list of frame processors (if not inheriting from another asset.)

Frame Processors (Reorderable List) : The list of currently used processors.
- If a frame processor is selected, below the list of processor list will appear the processor inspector.
- You can reorder processors by dragging them upwards or downwards in the list.
- You can enable or disable processors by clicking the toggle at the left of the Processor Title
Adding Processors
In order to add processors to the list, click the + button located at the bottom of the Processors List. Clicking the button opens the Processor Add Menu.

You can use the Input Search Field at the top to filter and refine processors, or navigate the categories by clicking the items, and finally add the processor you want by clicking it in the list.
Removing Processors
You can remove processor using the following :
- Select a processor in the list then click the "-" button located at the bottom of the Processor List.
- Click the Clear button to remove all processors at once.
Editing Processors
Upon Selecting a Processor in the list, it displays its properties below the Processors list. You can then edit these properties to modify its behavior.
Adjusting Processor Visibility

Upon Selecting a processor in the list, it becomes previewed automatically in the viewport. You can check its visibility by looking at the eye icon located in the right part of the processor item in the Processors Reorderable List.

You can lock or unlock the preview of a certain processor by toggling its lock icon, located in the far right part of the processor item in the Processors Reorderable List.
When in locked preview state, you can still select and edit other processors to preview the changes on the currently locked processor view.
Inheriting Processors and Settings from other Image Sequences

Inherit Processors From (Image Sequence Asset) : When using an Image Sequence asset in this field, the whole processor stack becomes overridden by the same processors and their configuration stored into the other asset. When inheriting, you cannot edit these values, except in the Asset that defined them.
Exporting the Image Sequence
After working on an image sequence, and adding processors, you will end up in a state where you want to generate a texture out of the result of this image sequence.
The Export Tab enables option in order to generate an image file and import it into the project. Once exported once, the texture can be updated by clicking the Update Exported Assets button, or the Update button in the Viewport.

Export Options:
- Export Format : lets you choose between Targa, PNG and EXR file formats. EXR file format will output an HDR texture.
- File Name (read only) : lets you review the file name of the texture.
- sRGB : will perform a sRGB conversion of the color data while writing the file (does not apply to EXR)
- Export Alpha : will export the alpha channel as part of the main texture.
- Separate Alpha : will export the alpha channel as separate, grayscale texture
Texture Import Options:
- Output Shape : Whether to export as simple Texture 2D or Texture 2D Array. In the case of Texture 2D Array, the texture importer will be set from given rows and columns defined in the image sequence. In case of incorrect size, a warning will be displayed.
- Import As : Whether to import the texture as Color, Sprite or Normal map
- sRGB: will set the sRGB import flag accordingly.
- Compress: whether the imported texture needs to be compressed.
- Generate MipMaps: whether the imported texture needs to have mip-maps generated.
- Wrap Mode: the wrap mode applied to the imported texture
- Filter Mode: the filter mode applied to the imported texture
Built-In Processors
This section details the built-in processors bundled with Image Sequencer and their behavior.
Main Category
Custom Material
Custom Material Processor enables using custom materials to process Frames. Custom Materials enable performing operations on a frame's pixels using a shader.
When selecting a Custom Material processor, the following inspector is displayed:

The material field references a material in the project, for use with this processor. When a material is selected, it displays its inspector below the material field.
You can adjust material properties directly in this inspector.
Note: Materials you edit in the inspector are edited directly in the asset so they can share their settings across various Image Sequences.
To write shaders compatible with Image Sequencer, see the Custom Material Shader documentation.
Color
Color processors work on image color for common tasks.
Alpha From RGB
Alpha from RGB Processor generates an alpha channel value based on luminance values stored in the RGB channels of the input frames.
When selecting an Alpha from RGB processor, the following inspector is displayed:

Color Filter : A color to apply as a tint before converting the RGB values to Grayscale.
Color Correction
The Color Correction processor applies Brightness, Contrast and Saturation control over the input Frames, as well as Alpha Remapping.
When selecting an Alpha from RGB processor, the following inspector is displayed:

- Brightness : Controls image Brightnness
- Contrast : Control Image Contrast
- Saturation : Control Image Color Saturation
- Alpha Curve : Remaps the Alpha Output Range based on the input Alpha values
Pre-multiply Alpha
The Pre-Multiply Alpha Processor applies a simple Alpha mask on RGB values to ensure RGB values are pre-multiplied by the alpha channel. This process is often required to use your textures in pre-multiplied alpha blend mode.
When selecting an Pre-Multiply Alpha processor, the following inspector is displayed:

- Remove Alpha (Toggle) : Replaces the alpha channel by a solid opacity
- Alpha Value (Float) : The solid opacity value to apply if Remove Alpha is enabled.
Remap Color
The Remap Color Processor remaps the output color based on a single grayscale value. This process is quite similar to Photoshop's Gradient Map filter.
When selecting an Remap Color processor, the following inspector is displayed:

- Color Source (Enum) : Controls how the input grayscale gradient is handled
- SRGB Luminance : RGB luminance as sRGB values (for sRGB input images)
- Linear Luminance : Linear Luminance (for HDR input images)
- Linear Red : Linear Red input channel value
- Linear Green : Linear Green input channel value
- Linear Blue : Linear Blue input channel value
- Alpha : Linear Alpha input channel value
- Remap Gradient (Gradient) : Gradient sampled using the input grayscale value to output values.
Remove Background
The Remove Background Processor works by trying to remove the RGB values of the background color and restoring the original color of the alpha blended element.
When selecting a Remove Background processor, the following inspector is displayed:

- Background Color (Color) : the assumed Color of the background, used for reverse lerp.
- Grab (Button) : Tries to fetch the first pixel's color to use it as the background color.
Common
Common-category processors work on various tasks such as optimizing the size of every frame and performing adjustments.
Crop
The Crop Processor applies cropping to the four edges of a frame in order to reduce unused transparent space and maximize overdraw efficiency. It provides an automatic computation of the closest bounds.
When selecting a Crop processor, the following inspector is displayed:

- Top (Slider) : The amount of pixels to crop at the top edge of the image.
- Bottom (Slider) : The amount of pixels to crop at the bottom edge of the image.
- Left (Slider) : The amount of pixels to crop at the left edge of the image.
- Right (Slider) : The amount of pixels to crop at the right edge of the image.
- Automatic Crop Values : A tool that computes automatically the Top, Bottom, Left and Right values.
- Alpha Threshold (Slider) : The alpha threshold taken into account for the closest bound computation
- Find (Button) : Clicking this button will perform the check on all Crop processor's input frames.
Fix Borders
The Fix Border Processor applies gradient fading to all edges of the image, ensuring it fades towards transparent and/or a given color.
When selecting a Fix Border processor, the following inspector is displayed:

- Left (Slider) : The percentage in width that will fade in from the left edge.
- Right (Slider) : The percentage in width that will fade in from the right edge.
- Top (Slider) : The percentage in width that will fade in from the top edge.
- Bottom (Slider) : The percentage in width that will fade in from the bottom edge.
- Fade to Color : The blended target color that will apply to RGB channels (use alpha = 0 to not affect RGB at all)
- Fade to Alpha : The target alpha that will be blended to at the edges of the image (default 0 to fade out)
- Exponent : An exponent applied to the gradient to make it harder or softer
Resize
The Resize processor simply resizes images from the processor's input sequence.
When selecting a Resize processor, the following inspector is displayed:

- Width : the desired output width.
- Height : the desired output height.
Use the buttons to access common power of two values.
Rotate
The Rotate processor provides 90 degree step rotation to apply on the processor's input images.
When selecting a Rotate processor, the following inspector is displayed:

- Rotation Mode (enum) : Provides rotation options for 90, 180 or 270 degrees clockwise.
Sequence
Sequence processors applies processing that modifies the sequence timing's and frame count.
Decimate
The Decimate processor discards input images to keep only one image out of N.
When selecting a Decimate processor, the following inspector is displayed:

- Decimate By (int) : The decimation factor (keeping one image out of N).
Fade
The Fade processor fades the image alpha and color to a given color matte, based on a time curve.
When selecting a Fade processor, the following inspector is displayed:

- Fade to Color (Color) : The color to fade To
- Fade Curve (Curve) : The fading curve based on the overall progress of the sequence (percentage as X axis), with Y values blending from the Fade color (0.0) to the Actual color (1.0)
Loop Sequence
The Loop Sequence Processor outputs a sequence that is ensured to loop, based on a longer input sequence, and a sync frame.
Images from the input sequence are blended from a sequence prior to the sync frame and after the sync frame. Then blended using a curve in order to ensure the last and first frame (sync frame and sync frame+1) are contiguous.
When selecting a Loop Sequence processor, the following inspector is displayed:

- Input Sync Frame : the desired frame index to use as sync point.
- Output Sequence Length : the desired output sequence length, cannot be greater than half of the input sequence length.
- Mix Curve : The blend curve to apply between the sequence prior to the sync point.
Retime
The retime processor applies temporal remapping to the input sequence in order to apply acceleration and/or deceleration to the motion of images.
When selecting a Retime processor, the following inspector is displayed:

- Sequence Length : the desired output sequence length
- Use Retiming Curve : whether to remap the time using a curve instead of a linear retiming.
- Retime Curve : the time remap curve to apply to the input sequence. Based on the output sequence percentage (X axis), and given the input sequence frames (Y axis)
Texture Sheet
Texture Sheet processors applies processing to image sequences to turn them into flipbooks or to turn flipbooks into sequences of images.
Assemble Flipbook
The Assemble Flipbook assembles a sequence of images into a flipbook sprite sheet of given rows and columns.
When selecting a Assemble Flipbook processor, the following inspector is displayed:

- Assemble Mode (enum) : How the input sequence is processed
- Full Sprite Sheet : Assembles the sprite sheet as rows and columns
- Vertical
- Columns (U) : how many columns to pack into
- Rows (V) : how many rows to pack into
- Find Best Ratios : Clicking this button will show a drop down with all Row and Column possibilities, sorted by closeness to a power-of-two-compatible ratio (ability to resize to sizes that are power of while maintaining a correct Texel aspect ratio)
Break Flipbook
The Break Flipbook operator splits an input image into a sequence of length based on the given number of rows and columns.
When selecting a Break Flipbook processor, the following inspector is displayed:
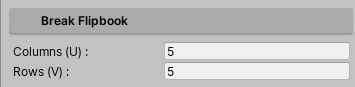
- Columns : the desired amount of columns to split into
- Rows : the desired amount of rows to split into.
Shaders for Custom Material Processor
Shaders for Custom Material processor provide a simple way to write a filter for Image Sequencer without relying to writing a full Custom Processor. By using a custom material processor you will be able to run a shader for every input frame and output an output frame of same dimensions and same rows and columns.
Writing a shader for Custom Materials
In order to create shaders for Custom material processor you need to create a simple unlit shader from the Project Create Menu : Visual Effects > Custom Material (Shader). You can alter the default code to match the following code:
Shader "ImageSequencer/SimpleCustomMaterial"
{
   Properties
   {
   }
   SubShader
   {
       Tags { "RenderType"="Opaque" }
       LOD 100

       Pass
       {
           CGPROGRAM
           #pragma vertex vert
           #pragma fragment frag

           #include "UnityCG.cginc"

           struct appdata
           {
               float4 vertex : POSITION;
               float2 uv : TEXCOORD0;
           };

           struct v2f
           {
               float2 uv : TEXCOORD0;
               float4 vertex : SV_POSITION;
           };

           sampler2D _InputFrame;
           float4 _FrameData;
           float4 _FlipbookData;

           v2f vert (appdata v)
           {
               v2f o;
               o.vertex = UnityObjectToClipPos(v.vertex);
               o.uv = v.uv;
               return o;
           }

           fixed4 frag (v2f i) : SV_Target
           {
               // Process the Color
               fixed4 col = tex2D(_InputFrame, i.uv);
               return col;
           }
           ENDCG
       }
   }
}
Specific Uniforms
In order to access the input frame texture, you need to declare sampler2D _InputFrame; as uniform variable in the body of the shader. This uniform must not be declared into the properties section of the shader.
If you want to access per-frame data, you can declare the following uniform variables in order to get values from Image Sequencer.
// ImageSequencer CustomMaterial uniforms
// ======================================
//
// sampler2D _InputFrame;			// Input Frame (from previous sequence)
//
// float4 _FrameData;				// Frame Data
//									//		x, y : width (x) and height (y) in pixels
//									//		z, w : sequence index (z) and length (w)
//
// float4 _FlipbookData;			// Flipbook Data
//									//		x, y : number of columns (x) and rows (y)
//									//		z, w : (unused)
Custom Processors
Custom Processors can be created in your project, to extend the features of Image Sequencer. Custom processors differ from Custom Material Processors as they can access more of the ImageSequencer features:
- Output a sequence length that's different from the input sequence length
- Output a sequence of images of different pixel dimensions from the input sequence pixel dimensions.
- Change the numU and numV texture sheet cells.
- Perform multiple shader calls per execution
- Display a custom inspector and custom canvas overlay
Creating a new Custom Processor
You can create both assets by clicking the Create Asset Menu, under Visual Effects > Custom Processor (C#, Shader)
This will create the following assets:
-
A C# class that extends
UnityEditor.Experimental.VFX.Toolbox.ImageSequencer.ProcessorBase- This class is for use with UnityEditor assembly only and must be stored into an
Editorfolder. - The C# class must implement the
[Processor("Category","Name")]class attribute to be visible in the add menu.
- This class is for use with UnityEditor assembly only and must be stored into an
-
A Shader file that will be referenced and used by the C# class.
Here is a sample C# code that you can use as a starting base.
using System.Collections;
using System.Collections.Generic;
using UnityEditor;
using UnityEditor.Experimental.VFX.Toolbox.ImageSequencer;
using UnityEngine;

[Processor("Category","Sample Processor")]
public class SampleProcessor : ProcessorBase
{
    /// <summary>
    /// The Shader Path (in the project) of the Shader File
    /// </summary>
    public override string shaderPath => "Assets/Path/To/Shader.shader";

    /// <summary>
    /// The Processor Name (as it will appear in the list)
    /// </summary>
    public override string processorName => "Sample Processor";


    /// <summary>
    /// Default() configures a default instance of the processor
    /// of the processor (e.g: when it will be added from the menu)
    /// </summary>
    public override void Default()
    {
    }

    /// <summary>
    ///  OnInspectorGUI() displays the properties in the left pane editor.
    /// use the serializedObject to fetch serializedProperties
    /// </summary>
    public override bool OnInspectorGUI(bool changed, SerializedObject serializedObject)
    {
        return changed;
    }

    /// <summary>
    /// Process(int frame) method is called when the frame needs to be processed.
    /// ProcessFrame(int, texture) needs to be called in order to run the shader on the full frame.
    /// You can still perform Graphics.Blit() if you need to perform multiple blits.
    /// </summary>
    public override bool Process(int frame)
    {
        Texture inputFrame = RequestInputTexture(frame);
        ProcessFrame(frame, inputFrame);
        return true;
    }
}
Here is the corresponding Shader code:
Shader "Hidden/VFXToolbox/ImageSequencer/SampleProcessor"
{
	Properties
	{
		_MainTex("Texture", 2D) = "white" {}
	}
	SubShader
	{
		// No culling or depth
		Cull Off ZWrite Off ZTest Always

		Pass
		{
			CGPROGRAM
			#pragma vertex vert
			#pragma fragment frag

			#include "UnityCG.cginc"

			struct appdata
			{
				float4 vertex : POSITION;
				float2 uv : TEXCOORD0;
			};

			struct v2f
			{
				float2 uv : TEXCOORD0;
				float4 vertex : SV_POSITION;
			};

			sampler2D _MainTex;

			v2f vert(appdata v)
			{
				v2f o;
				o.vertex = UnityObjectToClipPos(v.vertex);
				o.uv = v.uv;
				return o;
			}

			fixed4 frag(v2f i) : SV_Target
			{
				return tex2D(_MainTex, i.uv);
			}
			ENDCG
		}
	}
}