37 KiB
Auth Service (AGC)
Service Introduction
AppGallery Connect provides a cloud-based Auth Service and SDKs to help you quickly build a secure and reliable user authentication system for your apps to verify user identity.
The AppGallery Connect auth service supports multiple authentication methods and is seamlessly integrated with other Serverless services to help you secure user data based on simple rules that you have defined.
Functions
By using the AppGallery Auth Service SDK, you can integrate one or more of the following authentication methods into your app for achieving easy and efficient user registration and sign-in.
-
Self-owned account: Your self-owned account is used to support the access of your existing authentication system so that your existing users can access other serverless services in a secure manner.
-
Anonymous account: Anonymous accounts can be used to access your apps as visitors. The auth service can assign user IDs to your app visitors so that they can access other serverless services in a secure manner. A visitor can be registered as a formal user and retain the original user ID to ensure service continuity.
-
Third-party accounts: AppGallery Connect allows user identity to be verified by using third-party authentication services. The AppGallery Auth Service SDK supports the following accounts for user identity verification:
- HUAWEI account
- HUAWEI Game Service account
- Phone number
- Email account
- WeChat account
- Weibo account
- QQ account
The following accounts, are supported only at sites outside China. You can use these authentication methods when the data storage location you select resides in Germany, Singapore, or Russia. The Google account and Google Play Game account authentication methods are supported only on devices installing Google Mobile Services (GMS).
- Google account
- Google Play Game account
- Facebook account
- Twitter account
Service Process
-
Obtain the authentication credential
The authentication method determines how you can obtain the authentication credential.
-
For a third-party account, the authentication credential is the OAuth token issued by the third-party auth service.
-
For an anonymous account, the authentication credential is the unified identifier generated by the on-device SDK for the app installation instance.
-
For a self-created account, the authentication credential is the token generated by the existing authentication system through the Server SDK.
-
-
Report the authentication credential
The app reports the authentication credential to the auth service through the AppGallery Auth Service SDK.
-
Verify the authentication credential
The auth service verifies authentication credential in the cloud.
-
Display the authentication result
The Auth service sends the authentication results back to the app. At this point the app can access and maintain the user's basic profile information (nicknames, avatars), as well as access and manipulate data protected by security rules in other Serverless services.
Setting up in Huawei AppGallery Connect
Prepare the environment
You must create AppGallery Connect project and add App to project and set Data storage location. For details, please refer to AppGallery Connect Quick Start.
Enabling the Auth Service
-
Sign in to AppGallery Connect and click My projects.
-
Find your project for which you need to enable Auth Service from the project list.
-
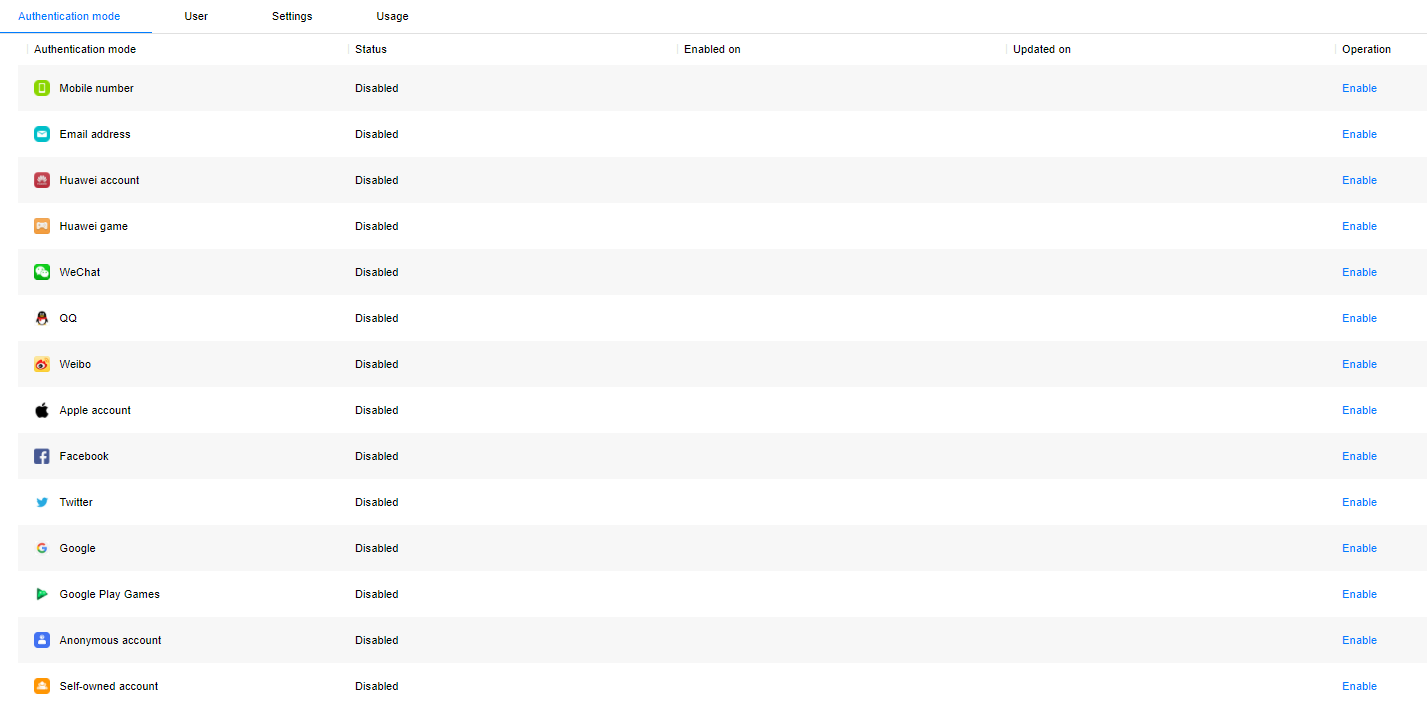
Go to Build > Auth Service. If it is the first time that you use Auth Service, click Enable now in the upper right corner.

-
Click Enable in the row of each authentication mode to be enabled.
NOTE: For details about the authentication modes supported by Android, please refer to Key Functions.
When you enable multiple authentication modes, you need to configure information required by your app in the dialog box that is displayed. The following table lists the authentication modes and how to obtain related configurations.

NOTICE:
Accounts marked with asterisks (*) are supported only at sites outside the Chinese mainland. You can use these authentication modes when the data storage location that you selected resides in Germany, Singapore, or Russia.Authentication Mode Information Required How to Obtain HUAWEI ID App ID and app secret Querying App Information HUAWEI GameCenter account Game public key and private key Querying Game Information WeChat App ID and app secret WeChat Integration Guide QQ App ID and app key QQ Integration Guide Weibo App key and app secret Weibo Integration Guide Facebook* App ID and app key Facebook Integration Guide Twitter* Client ID and client secret Twitter Integration Guide Google Play Games* Client ID and client secret Google Play Games Integration Guide Self-owned account Signature public key Obtaining JWTs -
(Optional) If email verification code authentication is enabled, configure email server information on the Settings tab page.
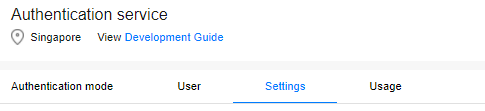 You can select Built-in SMTP or Custom SMTP.
-
When Built-in SMTP is selected, the sender name is the project name, and the sender address is product_id@mail.agconnect.link.
-
If you select Custom SMTP, configure the following information:
-
Sender address: email address of the sender.
-
SMTP user account and SMTP user password: user name and password for signing in to the email server.
-
SMTP host: name of the email sending server (SMTP server). For example, set this parameter for QQ accounts to smtp.exmail.qq.com.
-
SMTP port and SMTP security type: Set SMTP port to 465 and SMTP security type to TLS.

-
-
-
Config the json file
Note:
Downloadagconnect-services.jsonfrom AppGallery Connect (project settings->app information->agconnect-services.json)Copy the
agconnect-services.jsonfile to theAssets/Plugins/Android folder.
Setting up in Unity
Setting up unity Custom Android manifest and gradle
-
Switch platform to Android in Player setting.
-
Enable custom manifest and gradle in Player setting. The following is in unity 2019.4.

The android struct is updated after unity 2019.3. Manifest and Gradle are separated into multiple files (Main, Launcher & Base).
-
Set the package name in Edit -> Project Settings -> Player -> Android(icon) -> other settings -> Identification -> Package Name.
The package name is the package name of app in huawei project.

Integrating Auth Kit
-
Enable and add configurations to project gradle
Go to Edit -> Project Settings -> Player -> Android(icon) -> Publishing Settings -> Build
Enable Custom Base Gradle Template and add the configuration to the Maven repository. The path is
Assets/Plugins/Android/baseProjectTemplate.gradle.If your unity version is 2019.2 or before, you should add implement and other configuration on
MainGradleTemplate.gradle.-
In allprojects > repositories, configure the Maven repository address for the AppGallery Connect SDK.
allprojects { buildscript { repositories { ... maven { url 'https://developer.huawei.com/repo/' } ... } ... } ... repositories { ... maven { url 'https://developer.huawei.com/repo/' } ... } } -
In buildscript > dependencies, configure the AppGallery Connect plug-in address.
buildscript {
           dependencies {
...
            classpath 'com.huawei.agconnect:agcp:1.6.1.300'
...
           }
}
-
-
Enable launcher gradle and add configurations to gradle
Go to Edit -> Project Settings -> Player -> Android(icon) -> Publishing Settings -> Build
Enable Custom Launcher Gradle Template and add build dependencies in
launcherTemplate.gradle. The path isAssets/Plugins/Android/launcherTmeplate.gradle.If your unity version is 2019.2 or before, you should add implement and other configuration on
MainGradleTemplate.gradle.apply plugin:
'com.huawei.agconnect'in the file header:... apply plugin: 'com.huawei.agconnect' -
Enable and add configurations to MainTemplate gradle
Go to Edit -> Project Settings -> Player -> Android(icon) -> Publishing Settings -> Build
Enable Custom Main Gradle Template and add build dependencies in
mainTemplate.gradle. The path isAssets/Plugins/Android/mainTemplate.gradle.If the unity version is 2019.2 or before, you should add implement and other configuration on
MainGradleTemplate.gradle.-
apply plugin: 'com.huawei.agconnect' in the file header:
... apply plugin: 'com.huawei.agconnect' **APPLY_PLUGINS** -
Configure build dependencies.
 dependencies {
       ...
   implementation 'com.huawei.agconnect:agconnect-credential:1.6.1.300'
   implementation 'com.huawei.agconnect:agconnect-auth:1.6.1.300'
...
}
-
-
Enable gradle properties
Go to Edit -> Project Settings -> Player -> Android(icon) -> Publishing Settings -> Build
Enable Custom Gradle Properties Template and add build dependencies in gradleTemplate. The path is
Assets/Plugins/Android/gradleTemplate.gradle.Add
android.useAndroidX=true
android.enableJetifier=true
Developing with the SDK
Integrating Third Party Login
Extending the UnityActivity Java Code
If you use third party Login, you should follow the manual Extending the UnityActivity Java Code, write a java class extends UnityPlayerActivity.
-
import com.unity3d.player.UnityPlayerActivity,android.content.Intent, android.os.Bundle, and our LoginManager service
... import android.content.Intent; import com.hw.unity.Agc.Auth.ThirdPartyLogin.LoginManager; import com.unity3d.player.UnityPlayerActivity; import android.os.Bundle; ... -
Add our Login Service function
LoginManager.getInstance().initialize(this)in onCreate function and add functionLoginManager.getInstance().onActivityResult(requestCode, resultCode, data)in onActivityResult functionprotected void onCreate( Bundle savedInstanceState) { super.onCreate(savedInstanceState); LoginManager.getInstance().initialize(this); ... } @Override protected void onActivityResult(int requestCode, int resultCode, Intent data) { ... LoginManager.getInstance().onActivityResult(requestCode, resultCode, data); ... }The whole class for example
package xxxxx; import android.content.Intent; import android.os.Bundle; import com.hw.unity.Agc.Auth.ThirdPartyLogin.LoginManager; import com.unity3d.player.UnityPlayerActivity; public class xxxxxx extends UnityPlayerActivity { @Override protected void onCreate(Bundle savedInstanceState) { super.onCreate(savedInstanceState); LoginManager.getInstance().initialize(this); ... } @Override protected void onActivityResult(int requestCode, int resultCode, Intent data) { ... LoginManager.getInstance().onActivityResult(requestCode, resultCode, data); ... } } -
Put this java file to
Assets/Plugins/Android
Modify the AndroidManifest.xml
-
First you need to enable
AndroidManifest.xmlGo to Edit -> Project Settings -> Player -> Android(icon) -> Publishing Settings -> Build, enable Custom Main Manifest and the file is in
Assets/Plugins/Android/AndroidManifest.xml -
Modify the Main Activity name, you should modify the com.unity3d.player.UnityPlayerActivity to your Activity (the java file you created in Extending the UnityActivity Java Code)
<activity android:name="Your Activity name(include package name)" android:theme="@style/UnityThemeSelector"> <intent-filter> <action android:name="android.intent.action.MAIN" /> <category android:name="android.intent.category.LAUNCHER" /> </intent-filter> <meta-data android:name="unityplayer.UnityActivity" android:value="true" /> </activity> -
Add the INTERNET User permission
<uses-permission android:name="android.permission.INTERNET"/>
<application>
  ...
</application>
Third Party Integrating
If you want to enable third Party Login, firstly you need to AppGallery Connect, enable the Provider and enter the APP ID and APP Secret

-
HUAWEI ID
Refer to the Configuring App Information in AppGallery Connect, Integrating the HMS Core SDK, Configure build dependencies in
MainTemplate.gradle, about {version}, you can look up the doc Configuring App Information in AppGallery Connect for detail.dependencies { ... implementation 'com.huawei.hms:hwid:{version}' ... } -
HUAWEI GameCentre Account
Refer to the Configuring App Information in AppGallery Connect,Integrating the HMS Core SDK Configure build dependencies in
MainTemplate.gradle. you can look up the doc Configuring App Information in AppGallery Connect for detail. -
Wechat
Refer to the Wechat Document
- Configure build dependencies in
MainTemplate.gradle
 dependencies {
      ...
  api 'com.tencent.mm.opensdk:wechat-sdk-android-without-mta:+'
...
}
Add following dependencies
dependencies { ... implementation 'com.squareup.retrofit2:retrofit:2.9.0' implementation 'com.squareup.retrofit2:converter-gson:2.1.0' ... }-
Create a Resources Folder in Asset Folder (Folder name must be Resources), and Go to HuaweiService->Auth->WxApi->WXEntryActivity.txt copy this file to Resources folder. It will be automatically packaged to your Android project.
-
Add
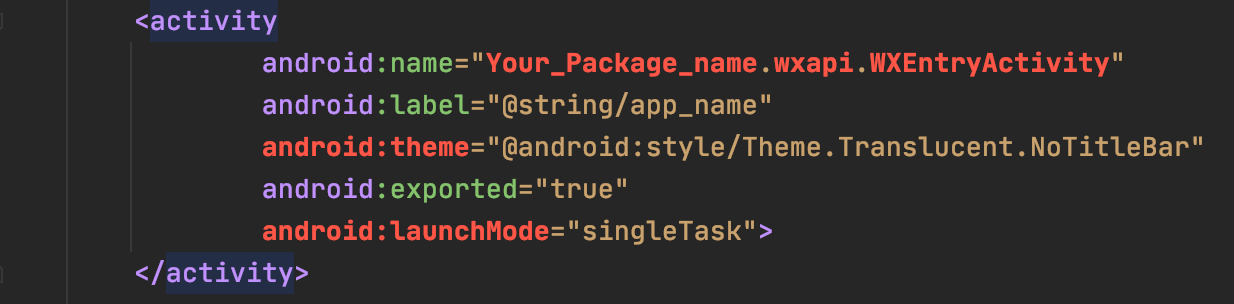
WXEntryActivityinAndroidManifest.xml, and the package name is same as Edit -> Project Settings -> Player -> Android(icon) -> other settings -> Identification -> Package Name
<activity android:name="Your package name.wxapi.WXEntryActivity" android:label="@string/app_name" android:theme="@android:style/Theme.Translucent.NoTitleBar" android:exported="true" android:launchMode="singleTask"> </activity> - Configure build dependencies in
-
Facebook Important Note: Facebook updated the webview policy
-
Facebook Login will no longer support Android embedded browsers (WebViews) for authenticating users. Please refer to the following documents for configuration!
-
https://developers.facebook.com/docs/facebook-login/android/deprecating-webviews
- Refer to the Facebook Doc, Configure build dependencies in
MainTemplate.gradle.
dependencies { ... implementation 'com.facebook.android:facebook-android-sdk:4.20.0' ... }- Add
meta-datainAndroidManifest.xml, replace "Your Facebook APP id" and "Your_Facebook_Login_protocol_scheme" with your own app_id and protocol scheme.
<meta-data android:name="com.facebook.sdk.ApplicationId" android:value="Your Facebook APP id"/> <activity android:name="com.facebook.FacebookActivity" android:configChanges= "keyboard|keyboardHidden|screenLayout|screenSize|orientation" android:label="@string/app_name" /> <activity android:name="com.facebook.CustomTabActivity" android:exported="true"> <intent-filter> <action android:name="android.intent.action.VIEW" /> <category android:name="android.intent.category.DEFAULT" /> <category android:name="android.intent.category.BROWSABLE" /> <data android:scheme="Your_Facebook_Login_protocol_scheme" /> </intent-filter> </activity> - Refer to the Facebook Doc, Configure build dependencies in
-
Twitter
Refer to the Twitter Doc, and Configure build dependencies in
MainTemplate.gradledependencies { ... implementation 'com.twitter.sdk.android:twitter-core:3.3.0' ... } -
Weibo
Refer to the Weibo doc, and you need to download the SDK and put it in
Assets/Plugins/Android. Add the following to thebaseProjectTmeplate.gradle.buildscript { repositories {**ARTIFACTORYREPOSITORY** google() jcenter() ... maven { url "https://dl.bintray.com/thelasterstar/maven/" } } -
QQ
Refer to the QQ doc , and you should download the SDK and put this SDK in
Assets/Plugins/Android. Add following Activity in inAndroidManifest.xml<uses-permission android:name="android.permission.ACCESS_NETWORK_STATE" /> <application> ... <activity android:name="com.tencent.tauth.AuthActivity" android:noHistory="true" android:launchMode="singleTask" > <intent-filter> <action android:name="android.intent.action.VIEW" /> <category android:name="android.intent.category.DEFAULT" /> <category android:name="android.intent.category.BROWSABLE" /> <data android:scheme="Your tencent APP ID" /> </intent-filter> </activity> <activity android:name="com.tencent.connect.common.AssistActivity" android:configChanges="orientation|keyboardHidden" android:screenOrientation="behind" android:theme="@android:style/Theme.Translucent.NoTitleBar" /> ... <application> -
Google
Refer to the Google documentation , and add configure build dependencies in
MainTemplate.gradledependencies { ... implementation 'com.google.android.gms:play-services-auth:19.0.0' ... } -
Google Play game
- Refer to the doc Google Play game, and add configure build dependencies in
MainTemplate.gradle
dependencies { ... implementation 'com.google.android.gms:play-services-games:17.0.0' ... }- Add following Activity in in
AndroidManifest.xml
<meta-data tools:replace="android:value" android:name="com.google.android.gms.games.APP_ID" android:value="@string/google_game_app_id" /> <meta-data tools:replace="android:value" android:name="com.google.android.gms.version" android:value="@integer/google_play_services_version" />- Modify the Google game app id to your own in
HuaweiService/Android/res/Auth/strings.xml
<?xml version="1.0" encoding="utf-8"?>
<resources>
    <string name="google_game_app_id">Replace me</string>
    <string name="facebook_app_id">Replace me</string>
    <string name="fb_login_protocol_scheme">Replace me</string>
    <string name="tecent_app_id">Replace me</string>

</resources>
Note:
For Google game login, you must modify thegoogle_game_app_idinstrings.xml, don’t type your game app id inAndroidManifest.xmldirectly, which will cause error. - Refer to the doc Google Play game, and add configure build dependencies in
Sign Your Android APP
go to Edit->project settings->player->Android(icon)->Publishing Settings, custom your own keystore, and make sure your android app keystore is the same with the thirdParty platform sign.
How to get Access Token Info from Third Party
NOTE:
You can directly use HuaweiOnsuccessListener and HuaweiOnFailureListener class or write new class inherit OnSuccessListener or OnFailureListener when need use callback function.
1. HUAWEI Account
-
start Login with HUAWEI Account, use
LoginManager.getInstance().startHWID(OnSuccessListener sucessCallback,OnFailureListener failCallback)to get the Access Token Json -
Then use
HWIDGetBack obj=JsonAuthorizeData<HWIDGetBack>.FromJson()to parse Json to get the TokenLoginManager.getInstance().startHWID(new HuaweiOnsuccessListener<string>((Token) =>{ HWIDGetBack obj = JsonAuthorizeData<HWIDGetBack>.FromJson(Token.ToString()); AGConnectAuthCredential credential =HwIdAuthProvider.credentialWithToken(obj.Token); AGConnectAuth.getInstance().signIn(credential) .addOnSuccessListener(new HuaweiOnsuccessListener<SignInResult>((signresult) => { ... })) .addOnFailureListener(new HuaweiOnFailureListener((exception) => { ... })); }), new HuaweiOnFailureListener((exception)=> { ... }));
2. HUAWEI GameCentre Account
-
start Login with HUAWEI Account, use
LoginManager.getInstance().startHWGame(OnSuccessListener sucessCallback,OnFailureListener failCallback)to get the Access Token Json -
and then use
HWGameGetBack player=JsonAuthorizeData<HWGameGetBack>.FromJson()to parse Json to get the Player info.LoginManager.getInstance().startHWGame(new HuaweiOnsuccessListener<string>((Token) =>{ HWGameGetBack player=JsonAuthorizeData<HWGameGetBack>.FromJson(Token ); AGConnectAuthCredential credential = new HWGameAuthProvider.Builder() .setPlayerSign(player.PlayerSign) .setPlayerId(player.PlayerId) .setDisplayName(player.DisplayName) .setImageUrl(player.ImageUrl) .setPlayerLevel(player.PlayerLevel) .setSignTs(player.SignTs) .build(); AGConnectAuth.getInstance().signIn(credential) .addOnSuccessListener(new HuaweiOnsuccessListener<SignInResult>((signresult) => { ... })).addOnFailureListener(new HuaweiOnFailureListener((exception) => { ... })); }), new HuaweiOnFailureListener((exception)=> { ... }));
3. Wechat Account
-
start Login with Wechat, use LoginManager.getInstance().startWechatLogin(string APP_ID,string APP_SECRET,OnSuccessListener successCallback,OnFailureListener failCallback) and then to get the Token and openID Json,
-
use
WechatGetBack obj= JsonAuthorizeData<WechatGetBack>.FromJson()to parse Json to get the Token and openIDLoginManager.getInstance().startWechatLogin("Your APP ID", "Your APP Secret", new HuaweiOnsuccessListener<string>((Token) => { WechatGetBack obj=JsonAuthorizeData<WechatGetBack>.FromJson(Token.ToString()); AGConnectAuthCredential credential = WeixinAuthProvider.credentialWithToken(obj.Token, obj.OpenId); AGConnectAuth.getInstance().signIn(credential) .addOnSuccessListener(new HuaweiOnsuccessListener<SignInResult>((signresult) => { ... })).addOnFailureListener(new HuaweiOnFailureListener((exception) => { ... })); }), new HuaweiOnFailureListener((exception)=> { ... }));
4. Facebook Account
-
Start login with Facebook Account, use LoginManager.getInstance().startFacebook(string APP_ID,OnSuccessListener successCallback,OnFailureListener failCallback) to get Access Token Json
-
Use FacebookGetBack obj=JsonAuthorizeData.FromJson(JsonObject.ToString()) to parse the token
LoginManager.getInstance().startFacebook("Your App Id",new HuaweiOnsuccessListener<string>((JsonObject) =>
{
   FacebookGetBack obj=JsonAuthorizeData<FacebookGetBack>.FromJson(JsonObject.ToString());

   AGConnectAuthCredential credential = FacebookAuthProvider.credentialWithToken(obj.Token);

   AGConnectAuth.getInstance().signIn(credential)
       .addOnSuccessListener(new HuaweiOnsuccessListener<SignInResult>((signresult) =>
       {
           ...
       })).addOnFailureListener(new HuaweiOnFailureListener((exception) =>
       {
           ...
       }));
}), new HuaweiOnFailureListener((exception)=>
{
   ...
}));
5. Twitter Account
-
Start login with Twitter Account,use LoginManager.getInstance().startTwitter(string App_id,string App_secret,OnSuccessListener successCallback,OnFailureListener failCallback)to get the Access Token Json,
-
and then use TwitterGetBack obj=JsonAuthorizeData.FromJson(JsonObject.ToString()) to parse the Json
LoginManager.getInstance().startTwitter("Your APP ID", "Your APP secret",
   new HuaweiOnsuccessListener<string>((Token) =>
   {
       TwitterGetBack obj=JsonAuthorizeData<TwitterGetBack>.FromJson(Token.ToString());
       AGConnectAuthCredential credential =
           TwitterAuthProvider.credentialWithToken(obj.Token, obj.Secret);

       AGConnectAuth.getInstance().signIn(credential)
           .addOnSuccessListener(new HuaweiOnsuccessListener<SignInResult>((signresult) =>
           {
               ...
           })).addOnFailureListener(new HuaweiOnFailureListener((exception) =>
           {
               ...
           }));
   }), new HuaweiOnFailureListener((exception)=>
   {
       ...
   }));
6. Weibo Account
-
Start login with Weibo Account,use LoginManager.getInstance().startWeibo(string APP_ID,OnSuccessListener successCallback,OnFailureListener failCallback) to get Token and Uid Json,
-
And use WeiboGetBack obj=JsonAuthorizeData.FromJson(JsonObject.ToString()) to parse Json
LoginManager.getInstance().startWeibo("Your APP ID",
   new HuaweiOnsuccessListener<string>((JsonObject) =>
   {
       WeiboGetBack obj=JsonAuthorizeData<WeiboGetBack>.FromJson(JsonObject.ToString());

       AGConnectAuthCredential credential =
           WeiboAuthProvider.credentialWithToken(obj.Token, obj.Uid);

       AGConnectAuth.getInstance().signIn(credential)
           .addOnSuccessListener(new HuaweiOnsuccessListener<SignInResult>((signresult) =>
           {
               ...
           })).addOnFailureListener(new HuaweiOnFailureListener((exception) =>
           {
               ...
           }));
   }), new HuaweiOnFailureListener((exception)=>
   {
       ...
   }));
7. QQ Account
-
Start login with QQ Account,use LoginManager.getInstance().startQQ(string app_id,OnSuccessListener successCallback,OnFailureListener failCallback) to get Token and OpenId Json
-
and use QQGetBack obj=JsonAuthorizeData.FromJson(Token.ToString()) to parse Json
LoginManager.getInstance().startQQ("Your APP ID",
   new HuaweiOnsuccessListener<string>((JsonObject) =>
   {
       QQGetBack obj=JsonAuthorizeData<QQGetBack>.FromJson(JsonObject.ToString());
       AGConnectAuthCredential credential =
           QQAuthProvider.credentialWithToken(obj.Token, obj.OpenId);
       AGConnectAuth.getInstance().signIn(credential)
           .addOnSuccessListener(new HuaweiOnsuccessListener<SignInResult>((signresult) =>
           {
               ...
           })).addOnFailureListener(new HuaweiOnFailureListener((exception) =>
           {
               ...
           }));
   }), new HuaweiOnFailureListener((exception)=>
   {
       ...
   }));
8. Google Account
-
Start login with Google Account,use LoginManager.getInstance().startGoogle(string client_id,OnSuccessListener successCallback,OnFailureListener failCallback) to get Token Json
-
and use GoogleGetBack obj=JsonAuthorizeData.FromJson(string json) to parse Json
LoginManager.getInstance().startGoogle("Your client id",
new HuaweiOnsuccessListener<string>((JsonObject) =>
{
   GoogleGetBack obj=JsonAuthorizeData<GoogleGetBack>.FromJson(JsonObject.ToString());
   AGConnectAuthCredential credential =
       GoogleAuthProvider.credentialWithToken(obj.Token);
   AGConnectAuth.getInstance().signIn(credential)
       .addOnSuccessListener(new HuaweiOnsuccessListener<SignInResult>((signresult) =>
       {

       })).addOnFailureListener(new HuaweiOnFailureListener((exception) =>
       {

       }));
}), new HuaweiOnFailureListener((exception)=>
{

}));
9. Google Play game Account
-
Start login with Google play game Account,use LoginManager.getInstance().startGooglePlay(string client_id,OnSuccessListener successCallback,OnFailureListener failCallback) to get Token Json
-
and use GooglePlayGetBack obj=JsonAuthorizeData.FromJson(string json) to parse Json
LoginManager.getInstance().startGooglePlay("Your client id",
new HuaweiOnsuccessListener<string>((JsonObject) =>
{
   GooglePlayGetBack obj=JsonAuthorizeData<GooglePlayGetBack>.FromJson(JsonObject.ToString());
   AGConnectAuthCredential credential =
       GoogleAuthProvider.credentialWithToken(obj.Token);
   AGConnectAuth.getInstance().signIn(credential)
       .addOnSuccessListener(new HuaweiOnsuccessListener<SignInResult>((signresult) =>
       {
        ...
       })).addOnFailureListener(new HuaweiOnFailureListener((exception) =>
       {
        ...
       }));
}), new HuaweiOnFailureListener((exception)=>
{

}));
10. Link
-
Firstly get Token Json, for example link Google account(linking with other third party is same as following)
use
LoginManager.getInstance().startGoogle(string client_id,OnSuccessListener successCallback,OnFailureListener failCallback)to get Token Json -
Parse the Json, for example Google account(Others are the same way), use
GoogleGetBack obj=JsonAuthorizeData<GoogleGetBack>.FromJson(string json) -
Get credential, for example Google account(Other are the same way), use
AGConnectAuthCredential credential = GoogleAuthProvider.credentialWithToken(obj.Token); -
use link function, for example Google account
LoginManager.getInstance().startGooglePlay("Your client id",
new HuaweiOnsuccessListener<string>((JsonObject) =>
{
   GooglePlayGetBack obj=JsonAuthorizeData<GooglePlayGetBack>.FromJson(JsonObject.ToString());
   AGConnectAuthCredential credential =
       GoogleAuthProvider.credentialWithToken(obj.Token);
   AGConnectAuth.getInstance().getCurrentUser().link(credential)
       .addOnSuccessListener(new HuaweiOnsuccessListener<SignInResult>((signresult) =>
       {
        ...
        AGConnectUser user = signInResult.getUser();
       ...

       })).addOnFailureListener(new HuaweiOnFailureListener((exception) =>
       {
        ...

       }));
}), new HuaweiOnFailureListener((exception)=>
{
 ...
}));
Demo Project
How to use this demo project?
Note: Auth demo code is in HuaweiServiceDemo->HuaweiAuthDemo
1. Import TMP
If Use AgcUnityAuth.unity demo,click Import TMP Essentials.

2. Add agconnect-services.json
Download agconnect-services.json from AppGallery Connect and put it to the Assets/Plugins/Android folder(Replace the original).
3. Replace with Your Own ID
modify HuaweiService/Android/res/Auth/strings.xml, Please Replace google_game_app_id, facebook_app_id, fb_login_protocol_scheme, tecent_app_id to your own id.
<?xml version="1.0" encoding="utf-8"?>
<resources>
    <string name="google_game_app_id">Replace me</string>
    <string name="facebook_app_id">Replace me</string>
    <string name="fb_login_protocol_scheme">Replace me</string>
    <string name="tecent_app_id">Replace me</string>

</resources>
4. Modify your package name
Make sure your package name is same with in AppGallery Connect and other ThirdParty developer platform( Edit -> Project Settings -> Player -> Android(icon) -> other settings -> Identification -> Package Name. The package name is the package name of app in huawei project.)

5. Replace App id and App secret in demo
Go to HuaweiAuthDemo->panel->DetailLogin.cs, replace your Appid and AppSecret to Which ThirdParty Login you need. (replace the string “Replace me”)
6. Modify Activity name in AndroidManifest.xml
If use Wechat Login, please modify the AndroidManifest.xml (plugins/Android/AndroidManifest.xml), replace "Your_Package_name" to your own Package name.
7. Generate JWToken
If you use Self-owned Login in demo, firstly need to generate JWT token (if you use our generating tool, token valid time is 48 hours) or you can generate JWT by your own Auth server.
-
Refer the Download Authentication Credential, enable service in AppGallery Connect And download agc-apiclient Credential file.
-
Our tool is in HuaweiServiceDemo->HuaweiAuthDemo->GenJWTokenGradle.zip, uncompress it, go to this directory run the command
./gradlew run --args='Your_Credential_file_path Need_Generate _RSA_Pair Your_user_id Your_display_name'Note: the second argument (1 represent need generate new RSA key pair, 0 represent don’t need generate new RSA key pair) For example:./gradlew run --args='/Users/XXX/Desktop/agc-apiclient-507787480892715392-6901174904591909948.json 1 123321 zzz' -
Copy the public key to your AppGallery Connect, and go to
HuaweiServiceDemo->HuaweiAuthDemo->panel->DetailLogin.cs, copy the JWT token to startSelf_own token.
8. Sign Your Android APP
go to Edit->project settings->player->Android(icon)->Publishing Settings, custom your own keystore, and make sure your android app keystore is the same with the thirdParty platform sign.